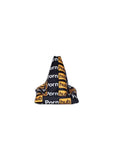
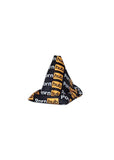
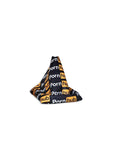
This Shift Boot is available with an Handbrake Boot option. It is made with a luxurious synthetic suede face and a synthetic rubber backing.
- Pattern placement varies. The placement of the pattern on the boot you receive may differ from photos.
- This item may be used as a shift boot cover or to replace your oem leather boot
- To use as a shift boot cover, simply slip it over your oem boot.
- Universal fitment (Our shift boots are approximately 8 inches in length from neck to bottom.)
NOTICE: If you have a Subaru BRZ/Scion FRS/Toyota GT86 or a Lexus IS300 please let us know by adding a note to your order in your cart while checking out. And let us know if it is a Left Hand Drive or Right Hand Drive so that we can make the handbrake boot to fit. This is because our universal handbrake boot does not fit on a Subaru BRZ, Scion FRS/GT86 or a Lexus IS300.
NOTE: If you are planning to order items as a gift, we advise that you do so at least 3 weeks in advance. This is because we can not guarantee on time delivery as most our items are made to order.
(We will not accept any exchanges or refunds once you make any incisions/modifications to our boot. You will be held fully responsible.)
Shift Boot & Handbrake Boot Guide
Synthetic Suede Shift Boots & E-Brake Boots
All of our synthetic suede boots can be used as a boot cover or to replace your OEM leather boot(s). Because they are made with a synthetic rubber backing, this makes them a little thicker and sturdier than the usual cotton boot covers out on the market.
See product description to find out if the material of the boot is Synthetic Suede. (Majority of our boots are.)
Replacing OEM Leather Boots
To replace your OEM shift boot leather with ours, we recommend using an adjustable shift boot collar/retainer ring available from other merchants with our boot to eliminate shift boot sag.
Our Synthetic Suede boots does not require an adjustable shift boot retainer ring as it already hold itself up fairly well.
(The boots does not come with pre-cut/pre-slit clip/tab holes. You will need to make them yourself if it is necessary.)
E-Brake Boots
The E-Brake boot can be used as a boot cover or replace your oem leather boot. The E-brake boot may require self modifications & trimming, along with the use of multi-purpose adhesive spray glue such as 3M.
Removing oem leather and using adhesive glue is suggested for 08+ Subaru Wrx/Sti, Subaru Legacy, Subaru Brz, Scion Frs, Toyota GT86. However, it may or may not be necessary.
(E-brake boots do not come with pre-cut/pre-slit clip/tab holes. You will need to make them yourself if it is necessary.)
Shift Knob Installation Guide
Use the correct thread pitch lock nut for your vehicle (same threads as your shift knob) available at your local auto parts stores, hardware stores or online to lock the shift knob in place rather than bottoming out or over-tightening the knob.
Screw the lock nut all the way down then screw on the shift knob. Position the knob to your liking while leaving a little space in between the shift knob & nut, then twist the lock nut up to make contact with the bottom of the knob. This will allow the shift knob to lock in place rather than damaging it by over-tightening.
Steering Wheel Guide
You will need a hub adapter/boss kit that is specific for your vehicle to convert your steering column from a spline design to a universal six bolt pattern for an aftermarket steering wheel set up.
All Shift Royal steering wheels utilize a 70mm PCD six bolt pattern. Therefore, many manufacturers produce products that are compatible. (Such as Momo, Sparco)
Door Panel Trim Installation Guide
Items required: Blade, Scissors, Plastic Scraper/Plastic Putty Knife or Card & Multi-purpose Adhesive Spray Glue. (An extra pair of hand is recommended)
Step 1 - You will need to remove your door panel. Once panel is removed, place the fabric over the panel as a test fit to get a visual idea of how to work with it.
Step 2 - Use the multi-purpose adhesive spray glue on your panel trim then carefully place our fabric over the panel. Make sure to fix any creases and that the fabric is adhered correctly. Plastic scraper/Putty knife or card may be helpful with removing creases.
(We recommend having another person help you lay the fabric over the panel to avoid or minimize chances of creating creases.)
Step 3 - Once the fabric is adhered after letting the adhesive dry a little, you'll then need to make incisions with a blade to any necessary areas. Once completed, proceed to re-installing the panel back on to your door.
For Headliner, steps are similar to door panels.
Face Masks
Our face masks are NOT medical grade masks (i.e. grade FFP2/N95)
The purpose of our masks are to help slow and reduce spread and help those who may have the virus and do not know it from transmitting it to others as advised by CDC.
CDC recommends wearing face coverings in public settings where other social distancing measures are difficult to maintain (e.g., grocery stores and pharmacies), especially in areas of significant community-based transmission.
The face coverings recommended are not surgical masks or N-95 respirators. Those are critical supplies that must continue to be reserved for healthcare workers and other medical first responders, as recommended by current CDC guidance.
Keep in mind that the use of a mask alone is not sufficient to provide an adequate level of protection. Physical distancing and hand hygiene should be adopted.
Do not purchase our masks with the false understanding they will prevent infection.


